Safe365 PC Manager Wizard Tutorial
Safe365 PC Manager Wizard is suite of disk software that includes Four editions for users to choose. It provides users the easiest solution to improve the performance and security of your computer. With it, you can free to create/mount/Unmount/remove/add a virtual disk image, backup and recovery files to protect your system & data against damage, move/resize/create/format/set active/delete/recovery/copy/surface test partition, create ramdisk, create bootable media, etc. It can be the most powerful software to make your digital life better.
Virtual Disk
It allows you to add and remove image files, create image file, mount and unmount the image file.
Create virtual disk
Mount image
Unmount
Remove image
Browse to add
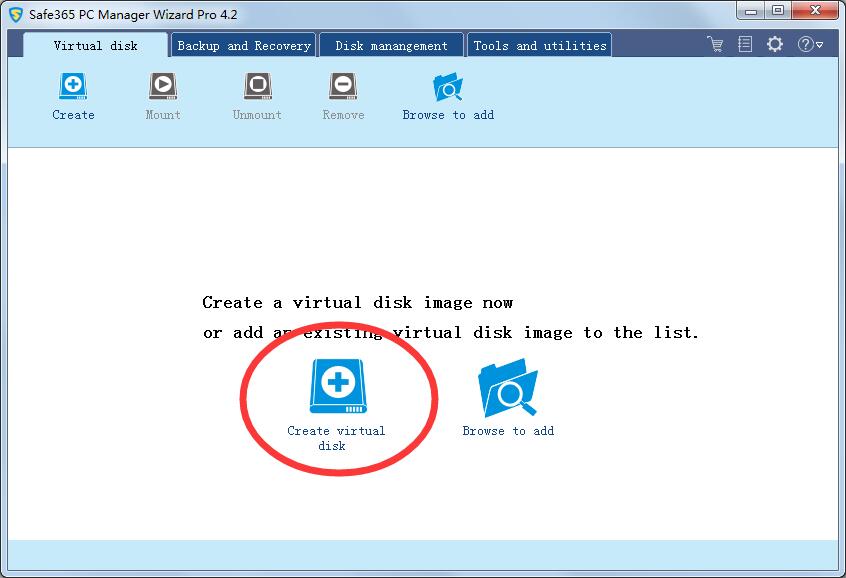
How to Create virtual disk - To create a new image file, click on 'Create virtual disk ...' from tray menu, or click on 'Create' button from 'Virtual disk' page.
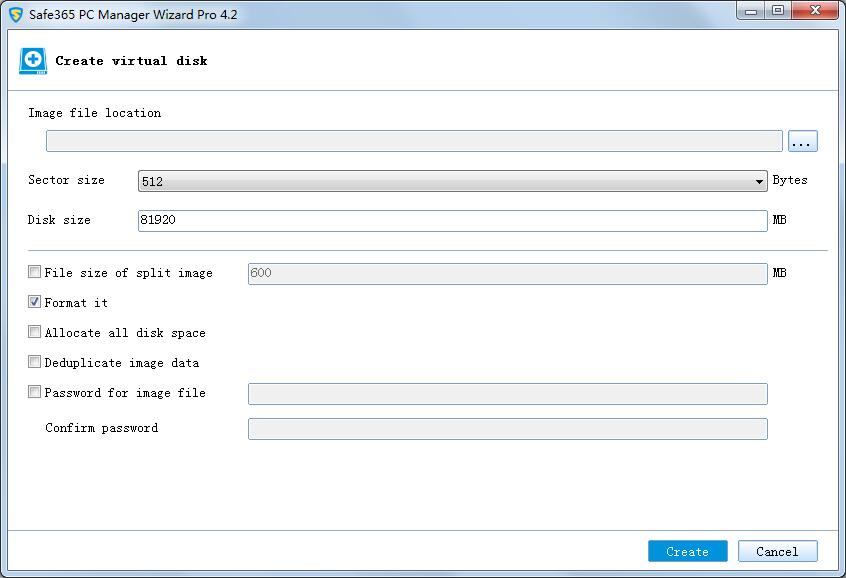
You have to specify a new file to host the volume. Input a new filename or click "..." button, select the desired path in the file selector , and type a new filename as you like.
You can input an integer value for sector size. Please note that the sector size must be multiples of 512.
You have to input an integer value for disk size. Please note that the size can not be changed after the volume is created.
You can choose split image file size for the volume. If you don't want to create a split image file, you cann't select "Split image file size".
You can check "Format it", if checked, the application will create a volume, and format it.
You can check "Allocate all disk space", if checked, the application will create the entire image file, even without the use of data.
Check or not the deduplicate image data.
You can choose your password for the image file.
Click Create to start create virtual image file.
Note: Virtual disk supported for deduplicate over 80GB can not be handled.
Mount - To mount an image, click on 'Mount' from image list.
If the image is password protected, you need to enter the password for the image.
You can for the image specifies a drive letter.
You can check 'mount it read-only'.
Click Proceed to mount the image.
Unmount - select a mounted image file from the list to unmount.
Remove - remove an image file from the list of image files. The image file is not deleted.
Browse to add - add an existing image file to the list of image files.
Backup and recovery
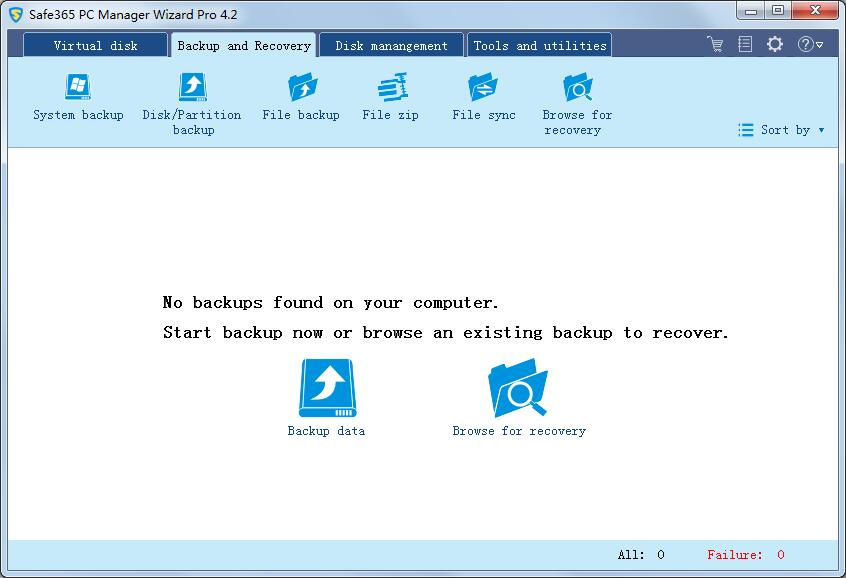
It offers simple and affordable data backup and disaster recovery software for PC/Laptop/Server. You can backup entire system/disk/file periodically and get recovered without worrying about reinstalling when system crash occurs.
Backup (Disk backup, File backup, Options, Schedule, Backup Strategy, Sector by sector backup)
Disk backup
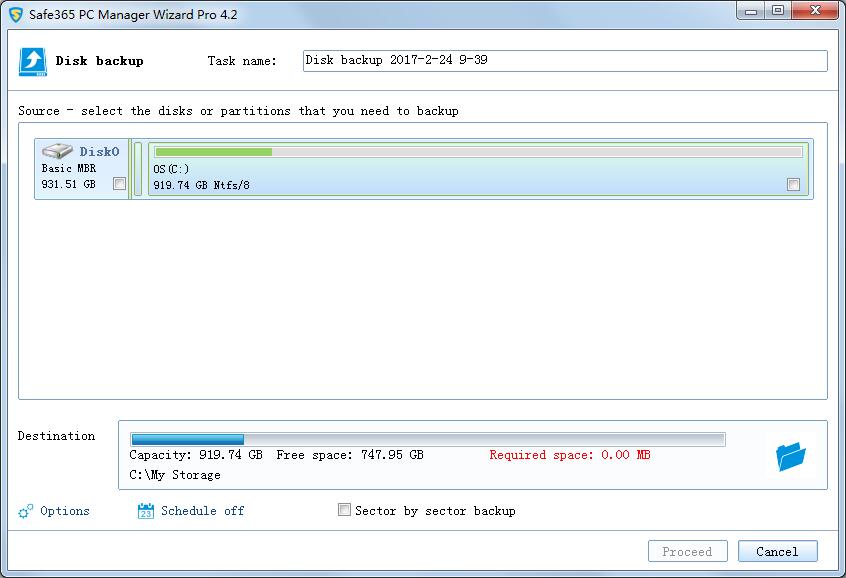
Disk backup will backup all your files on the disk into a compressed image file, including all partitions or volumes on this disk. That means if you backup a system disk, after restore, the restored disk could also be booted directly. It supports backup MBR disk, GPT disk, external hard drive, USB disk, and other storage devices that can be recognized by Windows.
Disk backup transfers all the data on the partition/disk(s) which you have selected to an image file. Click Disk/Partition Backup in the Backup and recovery page.
Specify the task name. An accurate task name will help you to distinguish this task from others which will make it much easier when you want to recover.
Select the disk/partition(s) to back up. The system partition will be selected by default at the first time. You can specify multiple partitions or hard disks as backup source.
Specify the destination to save the image file. Local disk, Network directory or NAS drive can be set as backup destination.
Set advanced parameters for the current backup task. See Options for detailed information.
To specify to when run the backup in a schedule, click Turn on. See Schedule for detailed information.
With Sector by sector backup selected, QILING Disk Master will backup all the sectors on the selected partition(s)/hard disk(s).To learn more, see Sector by sector backup.
Click Proceed to finish the setting. The backup will be executed immediately.
Dynamic volume backup
A dynamic volume is part of a dynamic disk; this kind of hard disk manages the volumes with a LDM (short for Logical Disk Manager) database. Compared with a basic disk, a dynamic disk can be divided into multiple types of volumes. Most of the volume types have advanced features in data storage, such as data redundancy in a Mirrored volume and fault-tolerant features in a RAID-5 volume.
The backup process would be the same as a common disk/partition backup task. The only difference is that all of the dynamic volumes would be listed in a single disk in the Disk Map of QILING Disk Master, though they may be located on different dynamic disks.
File backup
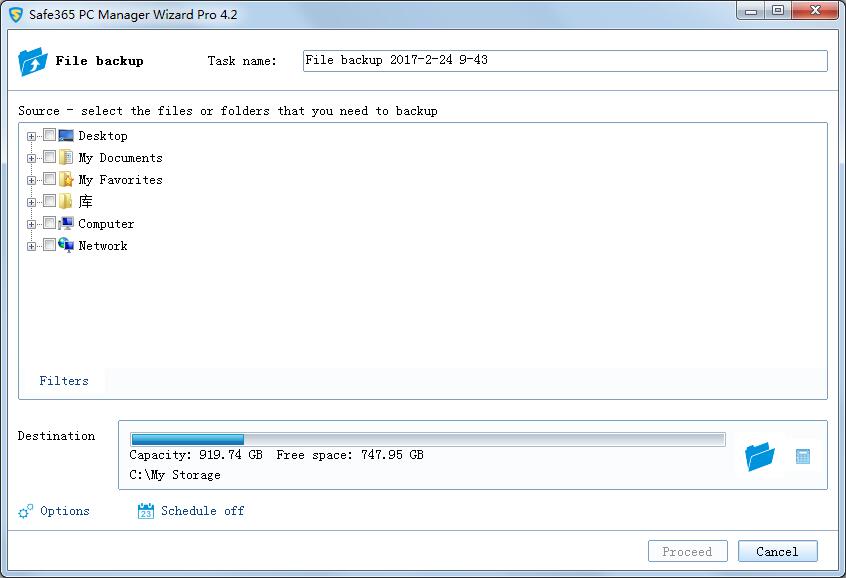
File backup will back up specified files, folders or file types including documents, pictures, music, emails, applications, videos and financial files, etc. with full backup, incremental backup, differential backup, schedule backup.
File backup transfers all the data on the volume(s) which you have selected to an image file. Click File backup in the Backup and recovery page.
Specify the task name. An accurate task name will help you to distinguish this task from others which will make it much easier when you want to recover.
Select the file/folder(s) to back up. You can specify multiple files or folders as backup source.
Set the file filters. To learn more, see Filters.
Specify the destination to save the image file. Local disk, Network directory or NAS drive can be set as backup destination.
Set advanced parameters for the current backup task. See Options for detailed information.
To specify to when run the backup in a schedule, click Turn on. See Schedule for detailed information.
Click Proceed to finish the setting. The backup will be executed immediately.
Backup options
Some advanced parameters you can set during a backup process. You can find the button at lower left corner in the step of choosing destination path in backup wizard, the changed parameters will influence current backup task, and following are the details about each parameters you can set.
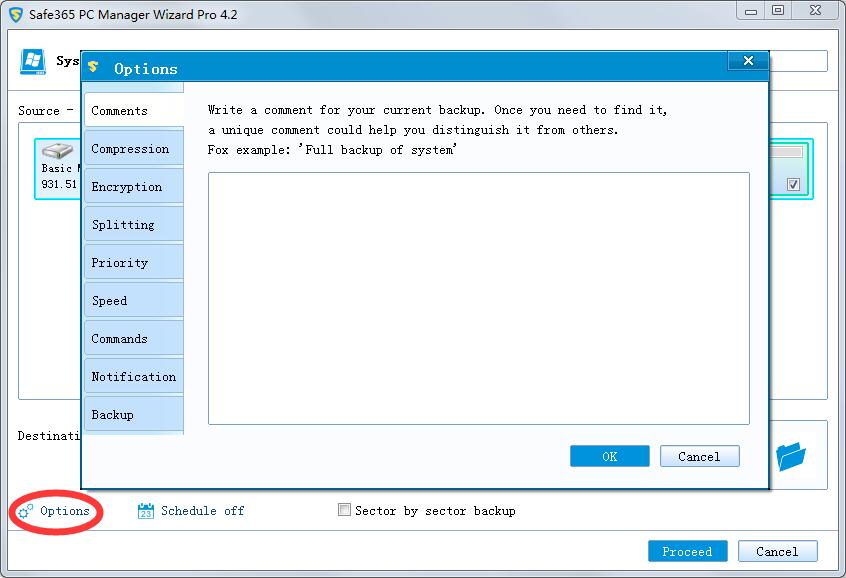
Comments - You can write a comment for your current backup task and it supports up to 1023 characters, so you can write a detailed description for your backup. Once you need to find the backup, this detailed description could let you remember what the backup is and distinguish it from others.
Compression - None: Data will be imaged without any compression, so the image file size will be equal to your original data; Normal: Data will be compressed in a moderate level. It is a recommended compression level; High: A much higher compression level, during the backup, the image file will be smaller than other levels and it will take a longer time to complete. Note: The size of generated image file may not significantly decrease even though the High compression level is selected. That is because some kinds of files are essentially compressed, such as .jpg, .pdf or .mp3.

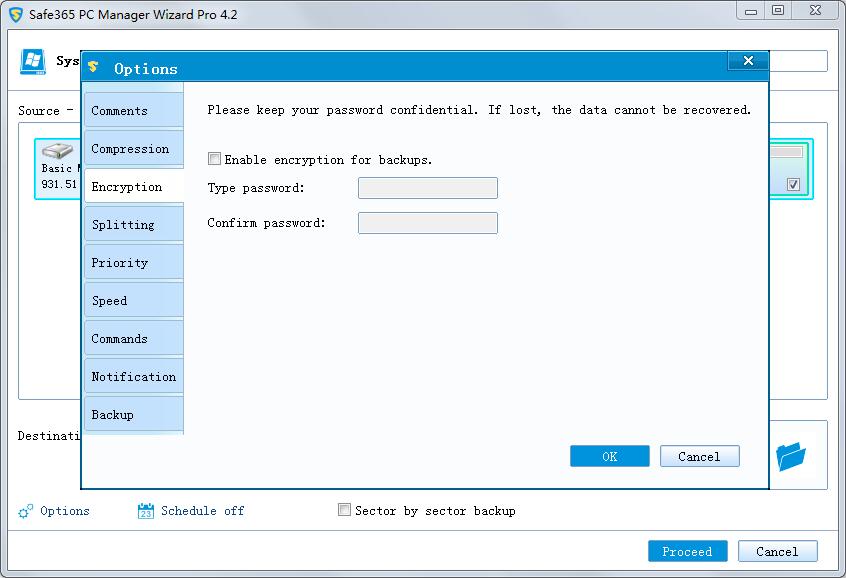
Encryption - Because of the image file can be accessed and restored by anybody, so in order to protect your data from unauthorized access, you could encrypt it by setting a password. Enter your password in the password field to encrypt it, and allows at most 63 characters. Enable encryption for backups. Enter the password for the backup archive into the password field. Retype the previously entered password into the Confirm password field. Note: If you try to recover data from a password-protected archive, the program will ask for the password in a special window, allowing access only to authorized users. The program use strong industry-standard AES (Advanced Encryption Standard) cryptographic algorithm, it will totally encrypt all data in the image.
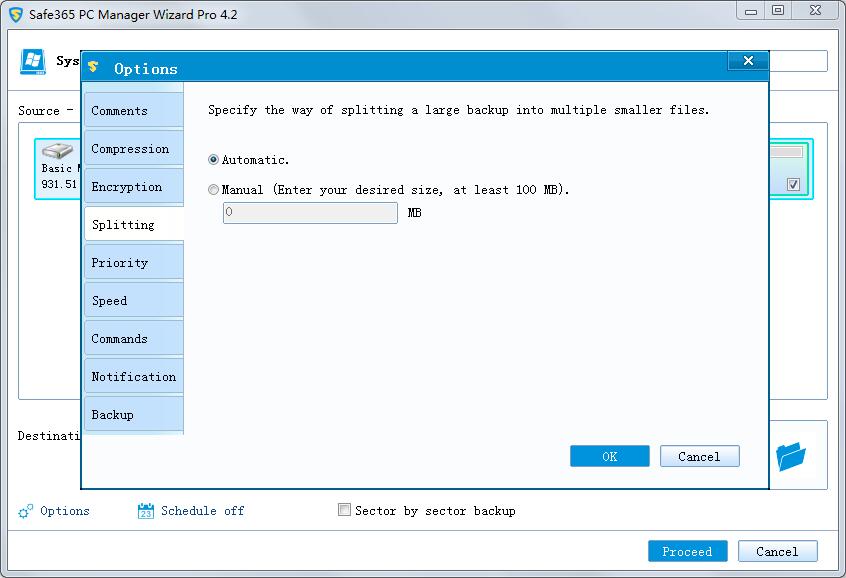
Splitting - To fit the size of the different storage medium, the image file can be split into several files. In other words, the program supports automatically to split one image file into several parts during the backup process. Select a mode to split a large image file to small files. Automatic - the split size depends on the file system on the destination storage medium. Manual - specify the split size manually, please notice that the minimum size our product can handle is 100MB.
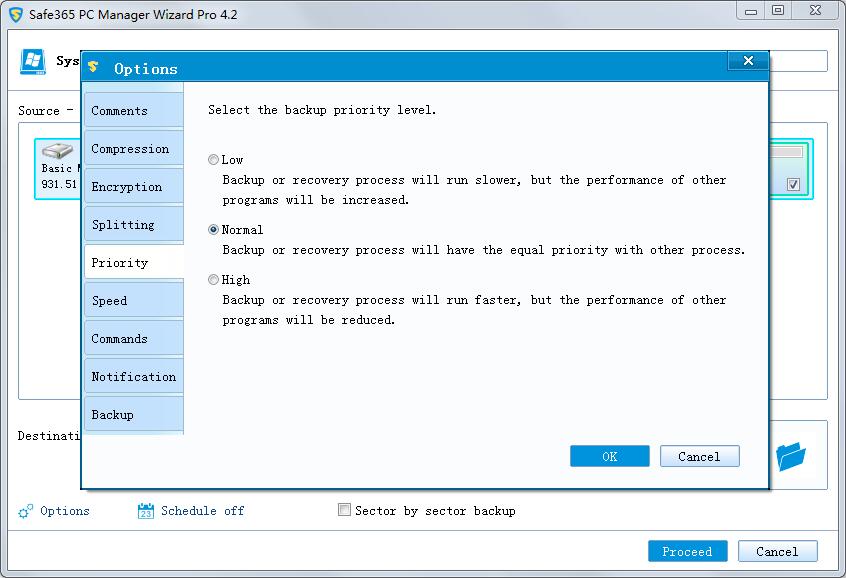
Priority - Windows is a multitasking system. It means that various applications are running simultaneously in it. The priority of an application is a parameter that tells the system which task has higher priority over other tasks. You can set up the backup process priority: Low - backup process run slower than other applications, if the backup task is not urgent, and some other applications need to be run at same time, this will be the best choice. Medium - backup process will have equal priority with other application. High - backup process has the highest priority and runs much faster than the other priority levels, but the performance of other applications may be significantly reduced. Note: The backup speed also depends on system environment and hardware configuration.
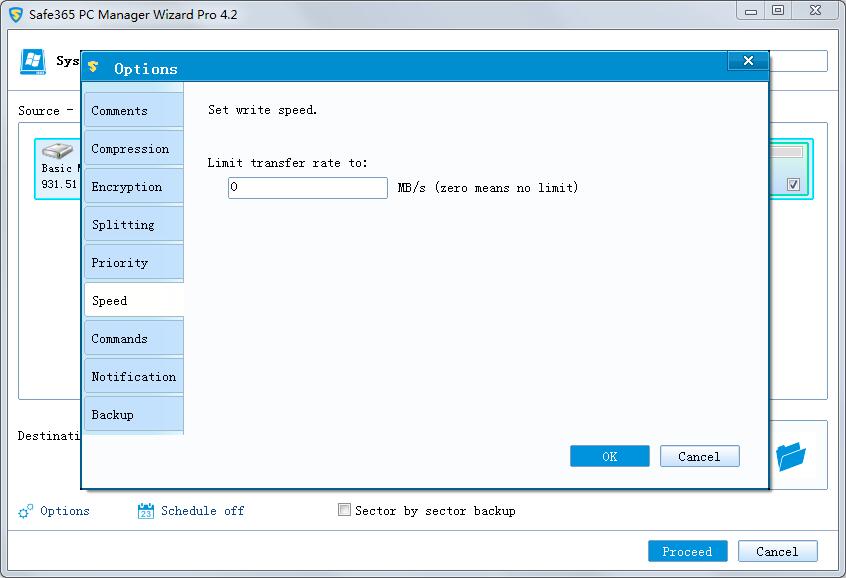
Speed - Set the network transmit speed. 0 Mbps means there is no limit for the network transmit speed, but all your network connection resource will be utilized by our product in this situation.
Pre-/Post-command - It is a useful feature for those who need to run some application or execute commands (or batch file) before/after backup. You may start/stop certain Windows processes or other applications before/after backup procedure. Target - an application or execute commands, and the command parameters when it needs. for example 'xcopy /y c:\a.txt d:\'. Start in - work path. Note: 1. Don't set to execute interactive command, for the application will let it run in background. Unless you kill the command process in Windows Task Manager, the application will never start to back up. 2. If you want to execute a batch file or run an application in Command, make sure you have specified the work path of it.

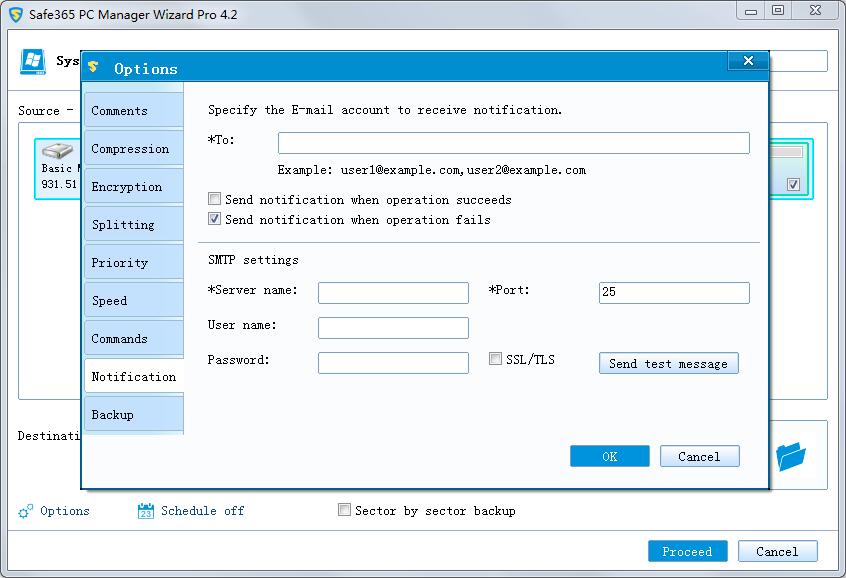
Notification - Except for checking Logs, email is a good way to let users know the result of backup plan. You just need to fill in your email and SMTP information here to complete this setting. To: - Specify email address to receive the email notification. Entering multiple email addresses is allowed here, but you have to separate them by Commas. Server name: - Specify SMTP server for sending notification. Generally it should be smtp.DomainName.com. Port: - Set the port of the outgoing mail server. Usually, you don't need to change the default port 25. But the following combinations is still worth to try if test with port 25 fails: 465 with or without SSL/TLS ticked; 587 with or without SSL/TLS ticked. Username/Password: - Enter User Name and Password of the mail server which used to send Email.
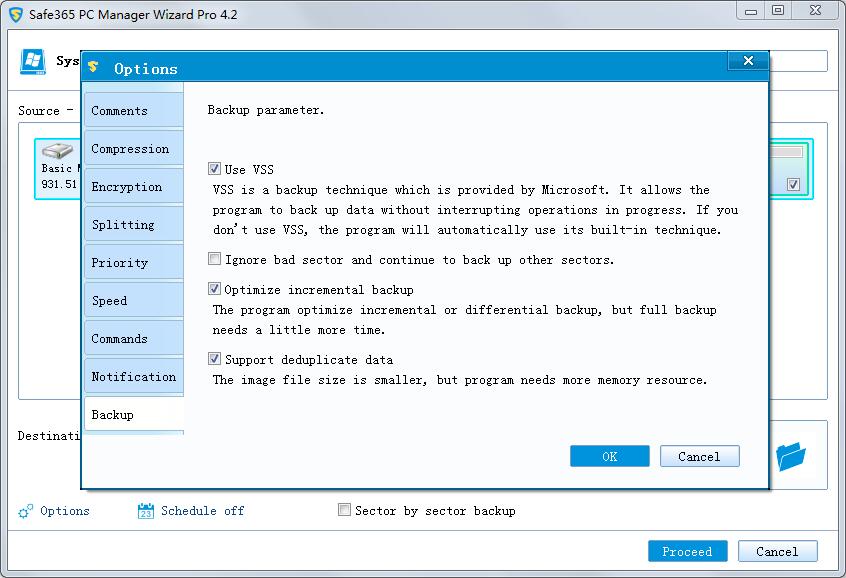
Backup - Use VSS - VSS is a backup technique which is provided by Microsoft. It allows the program to back up data without interrupting operations in progress. If you don't use VSS, the program will automatically use its built-in technique. Optimize incremental backup - The program optimize incremental or differential backup, but full backup needs a little more time. Support deduplicate data - The image file size is more small, but program needs more memory resource.
Recovery (Disk recovery, File recovery, Sector by sector recovery)
File zip transfers all the data on the volume(s) which you have selected to an zip file. Click File zip in the Backup and recovery page.
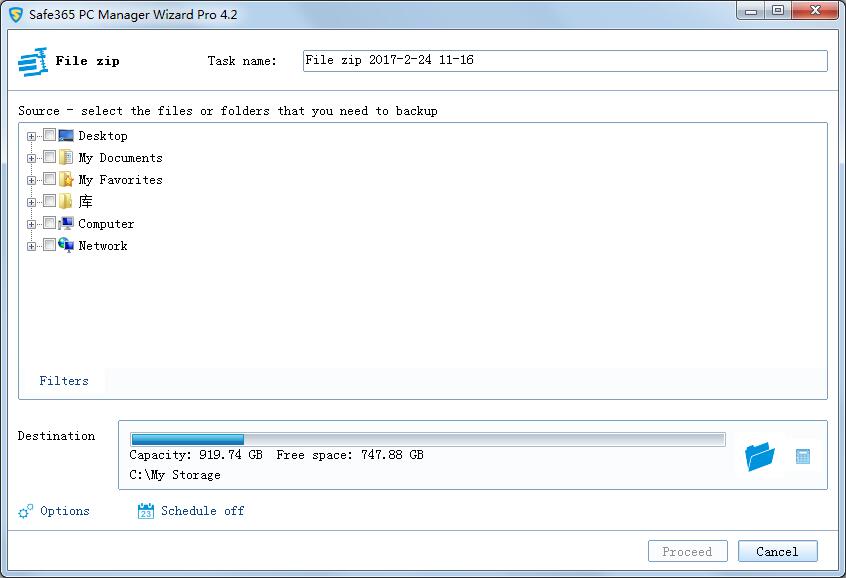
Specify the task name. An accurate task name will help you to distinguish this task from others which will make it much easier when you want to recover.
Select the file/folder(s) to compress. You can specify multiple files or folders as source.
Set the file filters. To learn more, see Filters.
Specify the destination to save the image file. Local disk, Network directory or NAS drive can be set as backup destination.
Set advanced parameters for the current backup task. See Options for detailed information.
To specify to when run the backup in a schedule, click Turn on. See Schedule for detailed information.
Click Proceed to finish the setting. The backup will be executed immediately.
File sync transfers all the data on the volume(s) which you have selected to an other location. Click File sync in the Backup and recovery page.
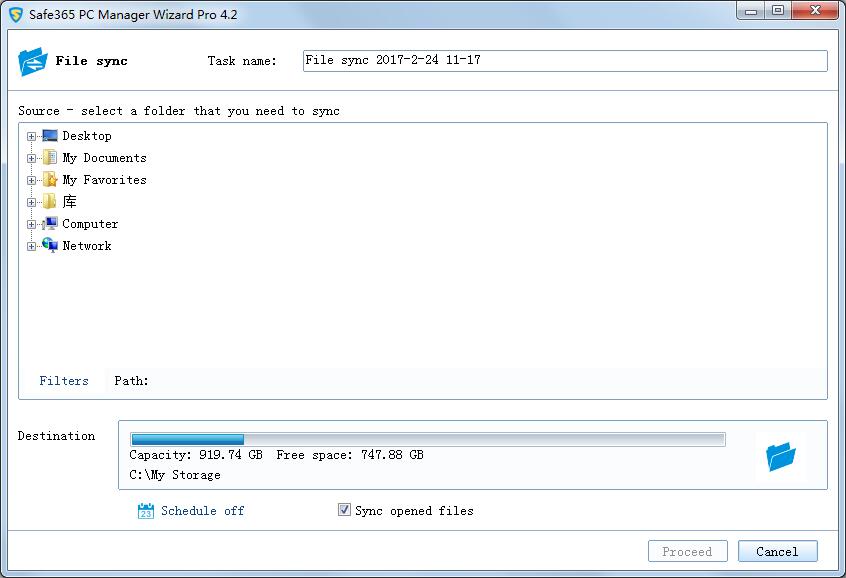
Specify the task name. An accurate task name will help you to distinguish this task from others which will make it much easier.
Select a folder to sync. You can only specify one folders as source.
Set the file filters. To learn more, see Filters.
Specify the destination to sync the file. Local disk, Network directory or NAS drive can be set as destination.
Sync opned files -- Click on this button, the application will start VSS, and sync the opened files to the destination.
To specify to when run the sync in a schedule, click Turn on. See Schedule for detailed information.
Click Proceed to finish the setting. The file sync will be executed immediately.
Disk management (Move/resize, Create partition, Format, Set active/Remove active, Delete partition, Partition recovery, Surface test)
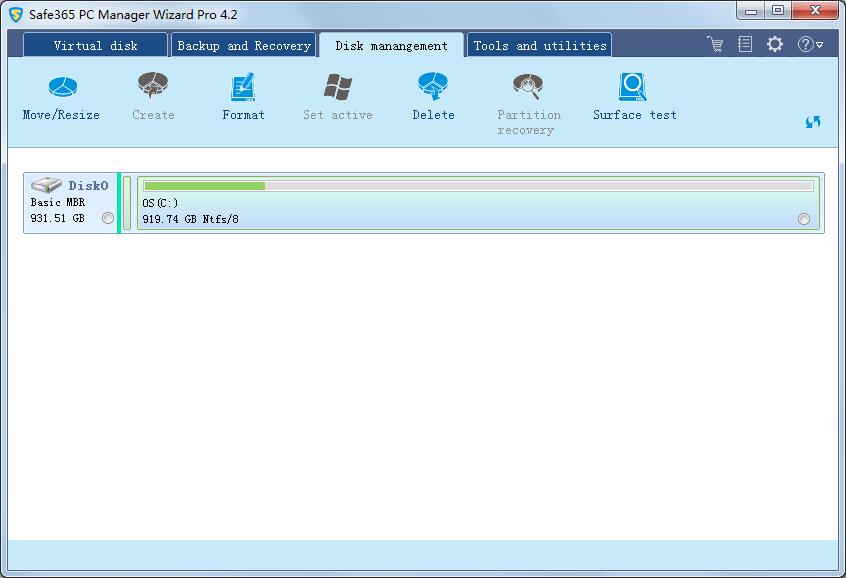
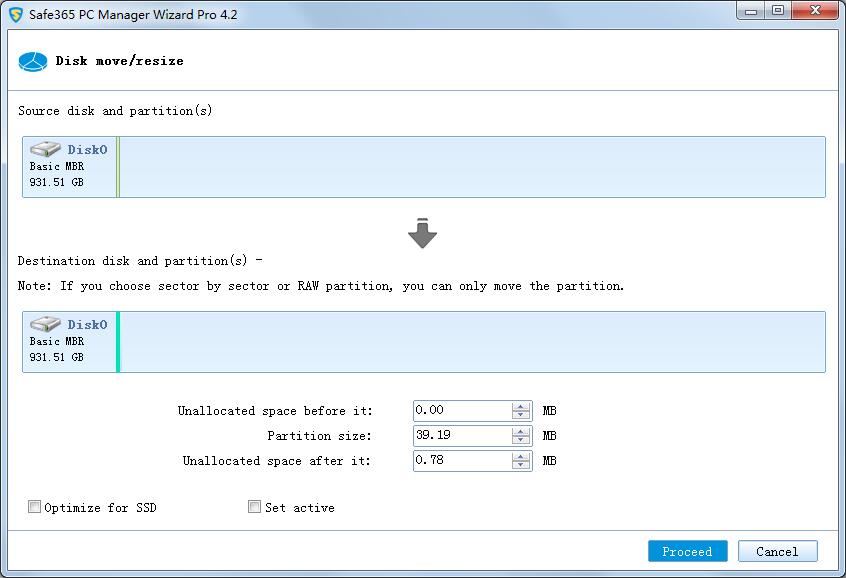
Disk move/resize - Modify the location and capacity of the target partition. Click 'Move/resize' in the Disk management page. 1. Click 'Move/resize' from the Disk management page to start the wizard. 2. Select the target disk or partition. 3. Determine the location and capacity of the target partition after the move/resize. If there is some free space adjacent to this partition, you can move it or resize it by simply dragging with your mouse. 4. Click Proceed to start move/resize. The move/resize process will be shown in the window.
Create partition - Select unallocated space -> choose 'Create' option from the Disk management page.
You can choose to format the partition as FAT, FAT32, NTFS, or just leave it unformatted.
You can choose cluster size. We recommend to keep the cluster size as default unless they have special needs, they can change it to 512, 1k, 2k, 4k, 8k, 16k, 32k or 64k.
You can give a label to the newly created partition in order to remind themselves of its content.
You can choose to drag the blue on both ends or input specific values to textboxes below to determine the size and location of new partition.
If the destination disk is SSD, check this option will ensure sector alignment in the process.
This function can only work for the Primary Partitions in the hard disk with MBR mode partitions. Only one primary partition can be set as active among all the primary partitions in the hard disk. The computer can only boot from the main partition that is set active.
You can choose to initialize a GPT disk or MBR disk if the disk is not initialized.
Click Proceed to execute create partition.
Click Cancel to cancel the operation.
Format partition - Format partition feature can help free up space or fix some file system errors. Nevertheless, formatting will result in data loss, so users should backup important files in advance.
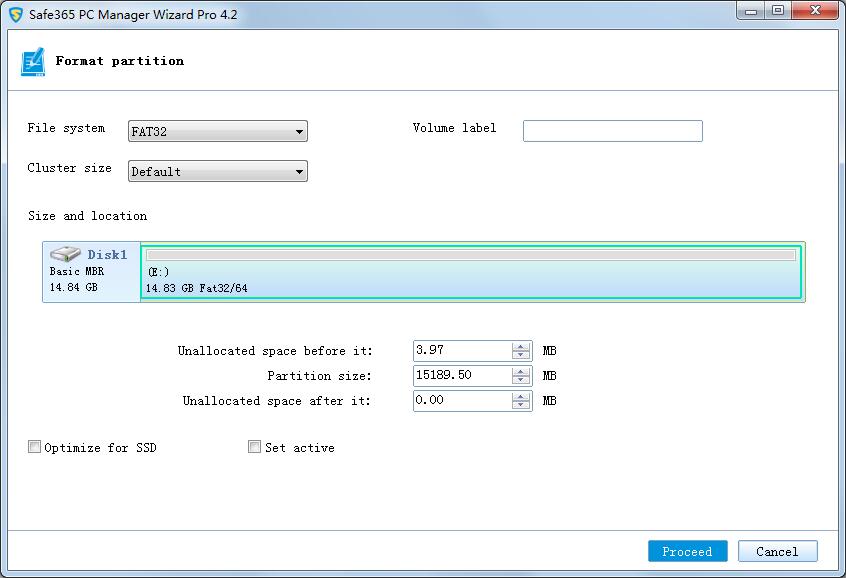
Select a partition -> choose 'Format' option from the Disk management page.
You can choose to format the partition as FAT, FAT32, NTFS, or just leave it unformatted.
You can choose cluster size. We recommend to keep the cluster size as default unless they have special needs, they can change it to 512, 1k, 2k, 4k, 8k, 16k, 32k or 64k.
You can give a label to the newly created partition in order to remind themselves of its content.
You can choose to drag the blue on both ends or input specific values to textboxes below to determine the size and location of new partition.
If the destination disk is SSD, check this option will ensure sector alignment in the process.
This function can only work for the Primary Partitions in the hard disk with MBR mode partitions. Only one primary partition can be set as active among all the primary partitions in the hard disk. The computer can only boot from the main partition that is set active.
Click Proceed to execute Format partition.
Click Cancel to cancel the operation.
Surface test - It can help confirm whether there are bad sectors on the target disk or partition. And it can scan each sector status by reading data from the sector. Sector block without reading error will mark as green color, and sector block with reading error will mark as red color. Select a disk or partition -> choose 'Surface test' option from the Disk management page.
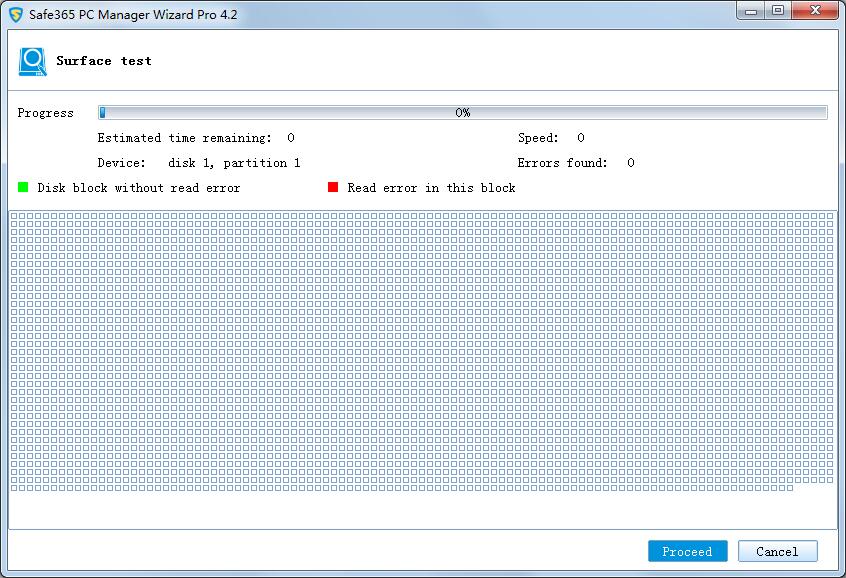
Click Proceed to execute Surface test.
Click Cancel to cancel the operation.
Tools and utilities (Create bootable media, Enable/Disable Pre-OS, Windows AIK, Create/Modify ramdisk, Start ramdisk, Stop ramdisk, Set temporary directory to ramdisk, Reset temporary directory to default, Hard disk health, Disk/Partition clone, Sector by sector clone, System clone, Fix boot, Mount, Wipe data, File shredder)
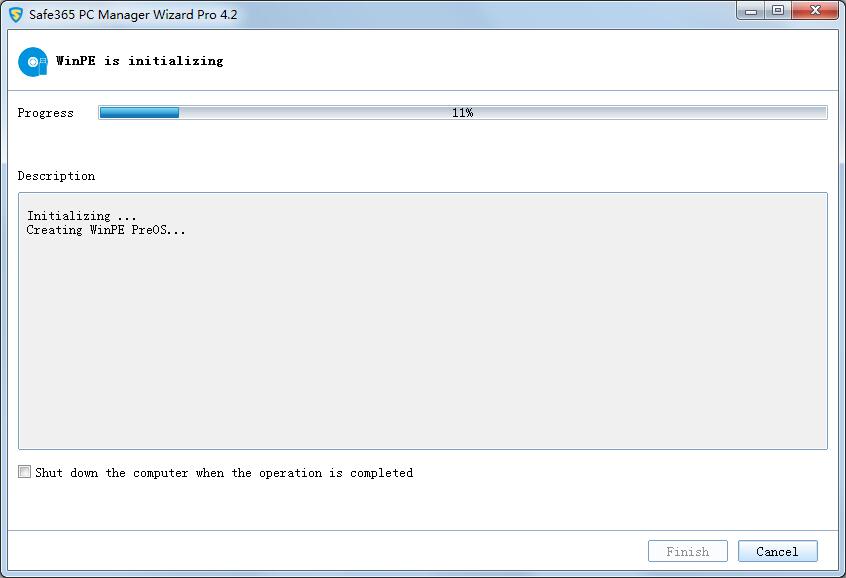
Create bootable media - It allows you to create both Windows PE (WinPE) based bootable disc easily while you would like to create a bootable media for emergency usage.
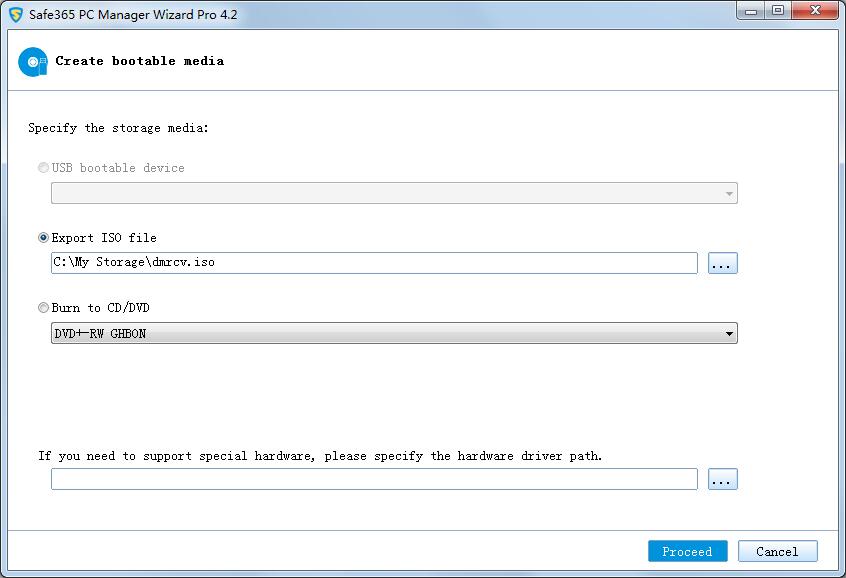
To create bootable disc, please click Tools and utilities tab and then select "Create bootable media".
Specify the storage media: USB device or ISO file.
Click Proceed to create rescue disk.
Enable/Disable Pre-OS - Switch the status of Pre-OS between Enable and Disable by clicking Enable/Disable Pre-OS under the tools page. The name of the button depends on the current status of Pre-OS. If Pre-OS is currently enabled, the button will be Disable Pre-OS. Once the Pre-OS enabled, you will get a boot menu which has our product listed. Select it and you can use our product before Windows starts to load. Pre-OS can be considered as a simple OS environment, in which you can use our product without system login or a system emergency disk. It is useful in various cases, especially when the operating system fails to boot. Logging into the Pre-OS environment and recovering from a previous image will resolve the problem easily.
Windows AIK - Before you do
If you are using Windows 7, Windows 8/8.1, or Windows 2012 R2, there may be no need to download Windows AIK. You can directly make a Windows PE bootable CD with QILING Disk Master.
You must download Windows AIK if QILING Disk Master pops up a prompt window, you are required.
To create a WinPE (Windows Preinstallation Environment) bootable CD with QILING Disk Master on Windows XP/2003/Vista/2008, you need to download Windows AIK.
Download from Microsoft Download Center
Windows AIK is short for Windows Automated Installation Kit. As its name displayed, it is a set of tools that could help you (mostly is OEM and IT professionals) to configure and deploy operating system to new hardware. In brief, that meant you could customize your own OS, as well as to create a WinPE bootable CD.
How to Install the Windows AIK ISO file?
After you downloaded Windows AIK ISO file, first you need virtual CD-ROM software and then you can install it on your computer. The following are concrete steps:
Download the latest version of MagicISO (A virtual CD-ROM software, only about 3MB large and support working on all Windows operating system) and install it.
Right click on Windows AIK ISO file->select MagicISO->Mount->the ISO file path, like the picture shows.
After that, in the popup window selects "Run StartCD.exe". And then follow the setup wizard to install Windows AIK on your computer.
Note: Windows AIK can not be installed on Windows 8.1, so if your system is Windows 8.1, you need to Download Windows ADK for creating bootable disc.
Create/Modify ramdisk - You can click on the 'Create ramdisk' or 'Modify ramdisk' button to create or modify the default ramdisk. Please note that changes the default virtual memory will be unmounted the default virtual memory. Certain programs use virtual memory may be affected.
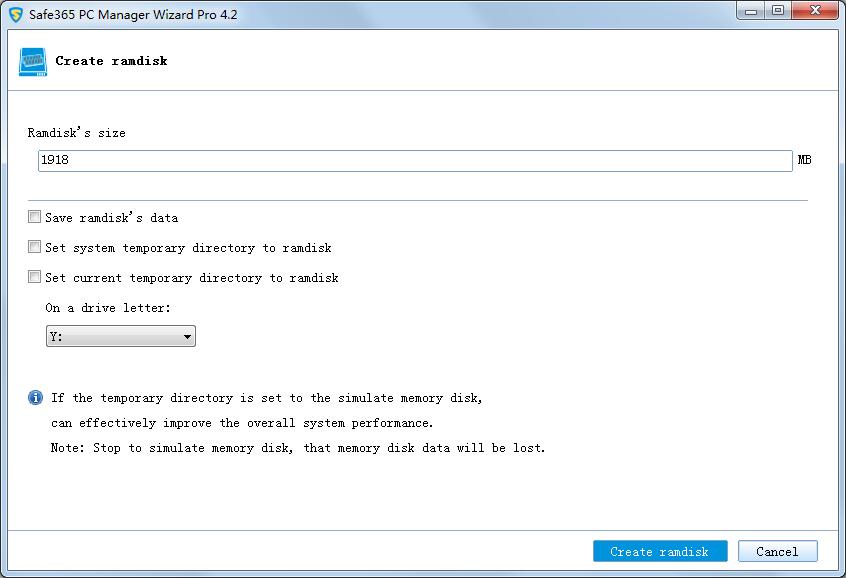
You have to input an integer value for ramdisk size.
You can check "Save ramdisk data".
You can set system temporary directory to ramdisk.
You can set current user temporary directory to ramdisk.
Click Modify ramdisk to start modify ramdisk.
Click Create ramdisk to start create ramdisk.
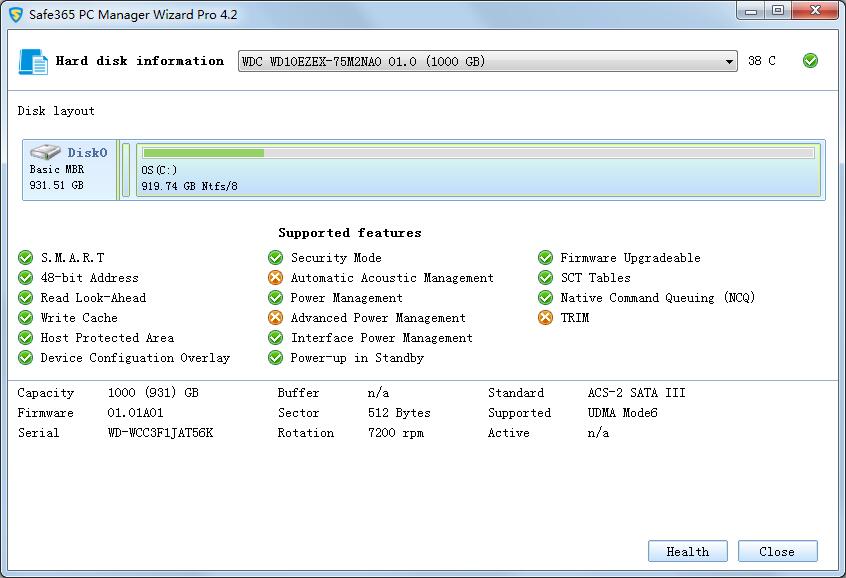
Hard disk health - Select a hard drive to view its information and SMART information
Disk/Partition clone
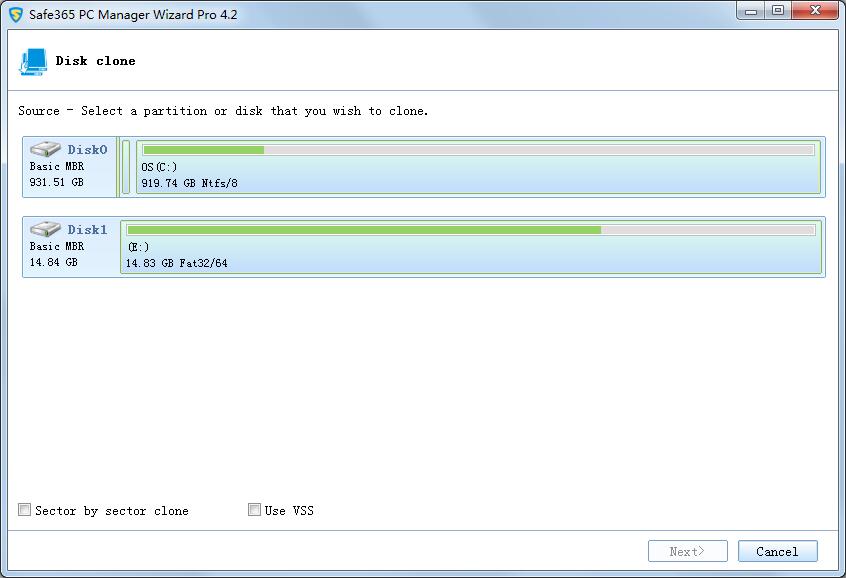
Click 'Clone' from the Tools and utilities tab to start the wizard.
Select the source disk or partition. Select the source disk or partition. Checking sector by sector clone option will clone the contents sector by sector. To learn more, see Sector by sector clone. Checking Use VSS option. VSS is a backup technique which is provided by Microsoft. It allows the program to back up data without interrupting operations in progress. If you don't use VSS, the program will automatically use its built-in technique.
Select the target disk or partition.
Determine the location and capacity of the target partition after the recovery. If there is some free space adjacent to this partition, you can move it or resize it by simply dragging with your mouse.
Click Proceed to start clone. The clone process will be shown in the window.
System clone

Click 'Migrate OS to SSD/HD' from the Tools and utilities tab to start the wizard.
Select options. Checking sector by sector clone option will clone the contents sector by sector. To learn more, see Sector by sector clone. Checking Use VSS option. VSS is a backup technique which is provided by Microsoft. It allows the program to back up data without interrupting operations in progress. If you don't use VSS, the program will automatically use its built-in technique.
Select the target disk.
Determine the location and capacity of the target partition after the recovery. If there is some free space adjacent to this partition, you can move it or resize it by simply dragging with your mouse.
Click Proceed to start clone. The clone process will be shown in the window.
Fix boot
If your computer has not booted, you can use this function. First, you need into Pre-OS, then run the Fixboot.
Wipe data
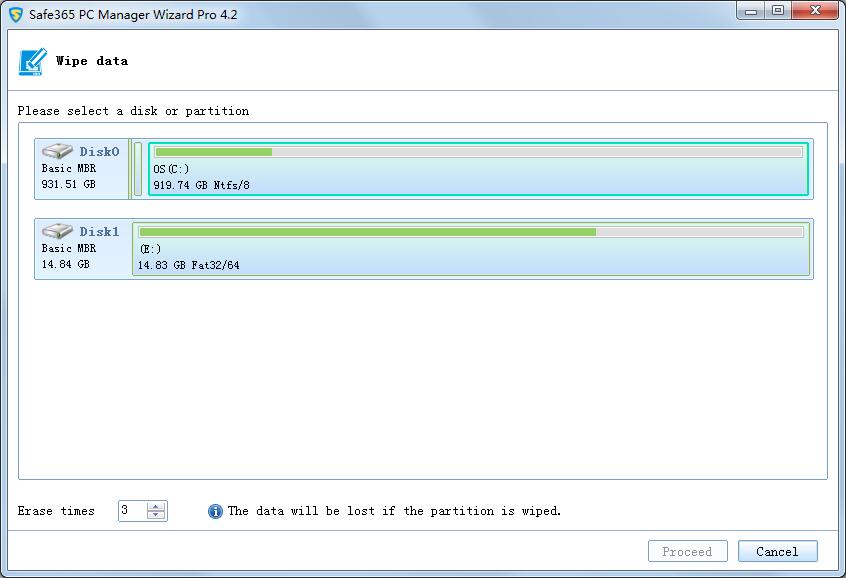
If you need to delete the confidential data, you can use Wipe data. Note: The data will be lost if the partition or disk is wiped.
File shredder
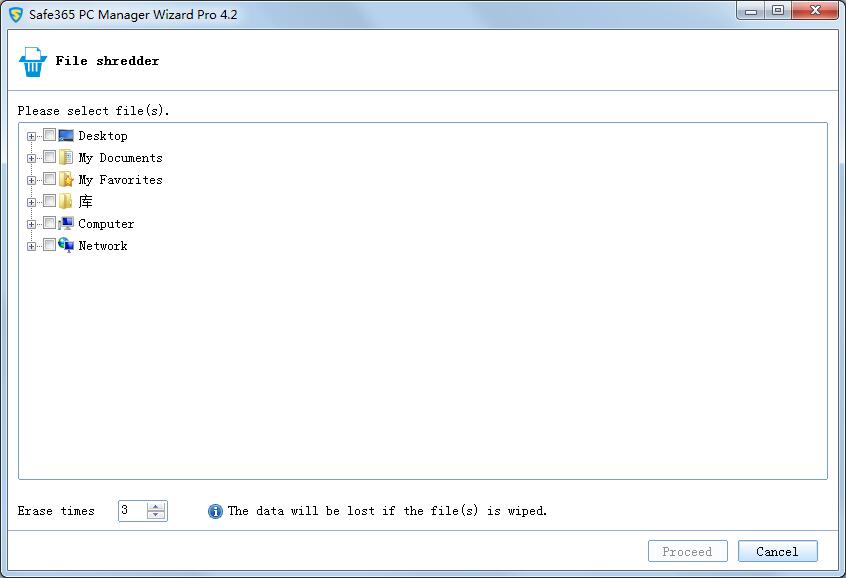
You can quickly select unnecessary files and folders and destroy them permanently. Note: The data will be lost if the files is wiped.
Main menu
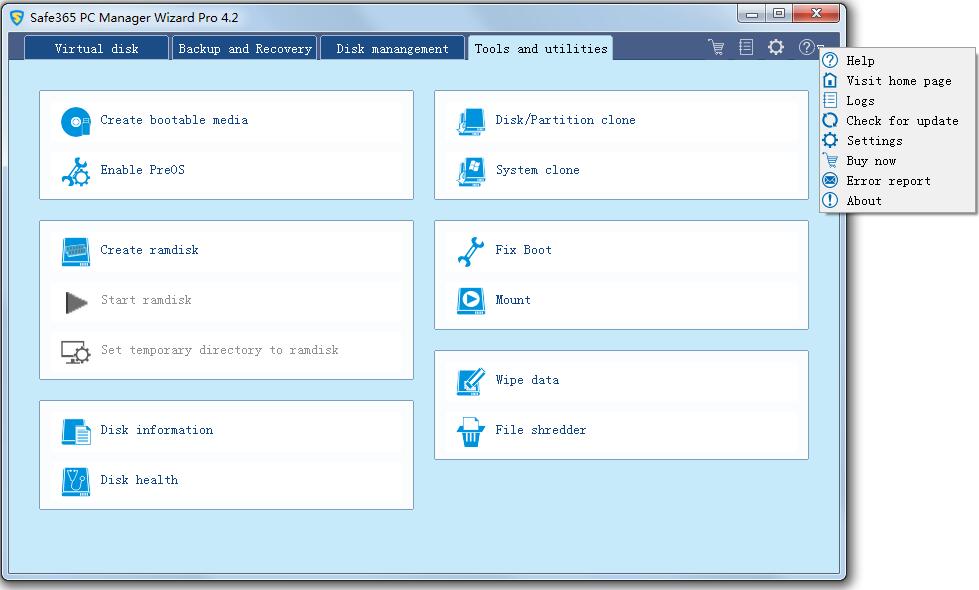
Logs
The log records not only what operations our product has done, but also lists the results of each operation, so you may check whether the task completed successfully.
Search - Select the start time, end time and task name to search logs.
Flush - the application displays the latest logs.
Clear - the application will clear all logs.